Mastering Siding Installation: Top Techniques for a Flawless Finish
Introduction: The Art and Science of Siding Installation
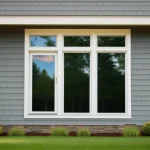
The curb appeal of a home speaks volumes, offering a first impression that hints at the care and attention to detail within. Beyond aesthetics, however, siding plays a critical role in protecting your investment from the elements, acting as the first line of defense against rain, wind, snow, and sun. Whether you’re a seasoned contractor overseeing a large-scale project, a dedicated DIY enthusiast tackling a weekend renovation, or a homeowner simply looking to understand the intricacies of exterior renovation, mastering siding installation is paramount.
A poorly installed siding job can lead to a cascade of significant problems down the line, including moisture damage that can rot the underlying structure, pest infestations that compromise the integrity of the walls, and reduced energy efficiency that translates to higher utility bills and a less comfortable living environment. These issues, often invisible in the initial stages, can quickly escalate into costly repairs, negating any perceived savings from a subpar installation. This comprehensive guide will delve into the essential techniques for achieving a flawless siding installation, covering various materials, best practices, and common pitfalls to avoid.
We’ll explore the nuances of vinyl, fiber cement, and wood siding, providing step-by-step instructions and expert advice to ensure a durable and aesthetically pleasing result. For instance, understanding the expansion and contraction properties of vinyl siding is crucial for preventing buckling in hot weather, a common issue often addressed by experienced installers using specific fastening techniques. Similarly, achieving a weathertight seal with fiber cement siding requires careful attention to caulking and flashing, skills that a DIYer can master with the right guidance.
From choosing the correct nails for wood siding to understanding the importance of proper ventilation behind any type of cladding, this guide will empower you with the knowledge to make informed decisions and achieve professional-grade results. Think of your home’s siding as a tailored suit – the right fit and meticulous construction are key to both appearance and performance. Investing time in understanding the principles of proper siding installation, whether you choose to do it yourself or hire a professional, is an investment in the long-term value and comfort of your home. This guide will provide you with the roadmap to success, ensuring your siding project enhances both the beauty and protection of your home for years to come.
Surface Preparation: The Foundation for Success
Surface preparation is the cornerstone of a successful siding installation. This critical phase, often underestimated, significantly influences the lifespan, weather resistance, and aesthetic appeal of your siding. Neglecting proper preparation can lead to a myriad of issues down the line, including uneven panels, moisture damage, and premature siding failure. Before embarking on the installation process, meticulously remove existing siding, trim, and any obstructions like light fixtures or vents. This clean slate allows for a thorough inspection of the underlying sheathing, a crucial step in identifying potential problems.
Once the sheathing is exposed, carefully inspect it for signs of rot, water damage, or insect infestation. Any compromised areas must be addressed before proceeding. Rotted wood should be replaced, and areas affected by water damage should be allowed to dry completely before repairs are made. For insect infestations, consult a pest control professional to ensure the issue is eradicated before new siding is installed. This proactive approach prevents the infestation from spreading to the new siding and ensures the long-term health of your home’s exterior.
Addressing these underlying issues at this stage will prevent costly repairs and ensure the longevity of your new siding. Next, ensure the wall surface is clean, level, and free of debris. A pressure washer can be highly effective in removing dirt, mildew, and loose paint. For stubborn residue, a scraper or wire brush can be used. This cleaning process creates an optimal surface for the new siding to adhere to, preventing future issues with adhesion and ensuring a smooth, professional finish.
Uneven surfaces can compromise the final look and structural integrity of the siding. Use a level to identify any irregularities and apply a leveling compound to create a smooth substrate. This extra step ensures that the siding panels lay flat and even, preventing warping and buckling. The final step in surface preparation involves installing a high-quality weather-resistant barrier (WRB), such as Tyvek or similar products. This crucial layer acts as a shield against moisture intrusion, protecting the underlying structure from water damage.
The WRB should be installed over the sheathing, overlapping the seams according to the manufacturer’s instructions to create a continuous, waterproof membrane. Properly installed WRB is essential for preventing moisture-related problems, such as mold growth and wood rot, which can significantly compromise the structural integrity of your home. In addition to protecting against moisture, the WRB also helps to improve energy efficiency by reducing air infiltration. This added layer of protection ensures a dry, comfortable, and energy-efficient home.
By meticulously preparing the surface, you are laying the groundwork for a successful and long-lasting siding installation. This foundational step, while often overlooked, is paramount to achieving a professional-looking finish and protecting your home from the elements. Remember, a well-prepared surface ensures that your siding not only looks great but also performs optimally for years to come, providing lasting protection and enhancing the curb appeal of your home. This investment of time and effort in surface preparation will pay dividends in the long run, minimizing the need for future repairs and maximizing the lifespan of your new siding.
Insulation and Weatherproofing: Protecting Your Investment
Insulation and weatherproofing are critical components of a well-executed siding installation, serving as the unsung heroes of exterior renovation. Proper insulation not only dramatically enhances energy efficiency, leading to lower utility bills and a reduced carbon footprint, but also contributes significantly to a more comfortable and consistent indoor climate. Think of it as a thermal blanket for your home, keeping you warmer in the winter and cooler in the summer. For DIY siding projects, understanding the R-value (thermal resistance) of different insulation types is crucial.
Local building codes often specify minimum R-values for exterior walls, so consult these before making any decisions. Neglecting this aspect can lead to long-term energy inefficiencies and potential code violations, impacting resale value and homeowner satisfaction. Consider adding or upgrading insulation during your siding project; it’s the ideal time to access and improve the thermal performance of your walls. Options abound, each with its own set of advantages and disadvantages. Fiberglass batts are a cost-effective and readily available choice, suitable for filling standard wall cavities.
Rigid foam boards, such as expanded polystyrene (EPS) or polyisocyanurate (polyiso), offer higher R-values per inch and can be installed over the exterior sheathing to create a thermal break, minimizing heat transfer through the studs. Spray foam insulation, while more expensive, provides excellent air sealing and insulation in one step, filling even the smallest gaps and crevices. When choosing between these options, factor in your climate, budget, the specific requirements of your home’s construction, and the long-term return on investment in energy savings.
Proper installation is just as important as selecting the right insulation material. Ensure that the insulation fits snugly within the wall cavities, minimizing air gaps and thermal bridging, which can significantly reduce its effectiveness. For fiberglass batts, avoid compressing the insulation, as this reduces its R-value. With rigid foam boards, carefully seal the seams with tape to prevent air infiltration. Spray foam requires professional installation to ensure proper application and avoid potential health hazards. Furthermore, consider the impact of moisture on insulation performance.
Some insulation types, like fiberglass, are susceptible to moisture damage, while others, like closed-cell spray foam, are more resistant. Integrating a vapor barrier into your wall assembly can help prevent moisture from entering the wall cavity and compromising the insulation’s effectiveness, especially in colder climates. Weatherproofing, the second pillar of a robust siding installation, involves meticulously sealing any potential entry points for water or air. This is where attention to detail truly pays off. Caulk around windows, doors, and other penetrations, such as electrical boxes and plumbing fixtures, to create a watertight seal.
Use high-quality, paintable caulk that is specifically designed for exterior applications and can withstand the elements. Inspect caulked areas regularly and reapply as needed to maintain a tight seal. For DIY siding projects, investing in a good quality caulking gun and practicing your technique on scrap materials can make a significant difference in the final result. Flashing is another essential element of weatherproofing, diverting water away from vulnerable areas. Install flashing around windows, doors, roof intersections, and any other penetrations in the wall.
Overlap the flashing properly to ensure that water flows away from the siding and onto the next layer of protection. Pay particular attention to the bottom edge of the siding, where water can easily accumulate. Using corrosion-resistant materials, such as aluminum or copper, for flashing is crucial for long-term durability. These small measures, often overlooked, can significantly improve the performance and longevity of your siding, protecting your home from water damage, mold growth, and costly repairs. By prioritizing both insulation and weatherproofing during your siding installation, you’re not just improving your home’s appearance; you’re safeguarding your investment and enhancing its overall comfort and efficiency.
Siding Material-Specific Installation Techniques
Each siding material demands specific installation techniques, impacting both the aesthetic and the longevity of your home’s exterior. Choosing the right material and understanding its nuances is crucial for a successful siding project. Let’s delve into the specifics of three popular choices: vinyl, fiber cement, and wood, offering insights for both DIY enthusiasts and those considering professional installation. **Vinyl Siding:** Favored for its affordability, ease of installation, and low maintenance, vinyl siding remains a popular choice.
Begin by installing starter strips along the bottom edge of the wall, ensuring a secure foundation for the first course. These strips are critical for proper alignment and prevent the siding from bowing or sagging over time. Overlap panels according to manufacturer instructions, typically around 1 inch, accommodating expansion and contraction due to temperature fluctuations. This “breathing room” prevents buckling and warping, common issues with improper vinyl siding installation. Use galvanized or stainless steel nails, driving them straight and level, avoiding over-nailing which can restrict this necessary movement.
A professional tip is to leave approximately a 1/4 inch gap at the ends of panels for thermal expansion, particularly in regions with significant temperature swings. For a cleaner finish, consider using color-matched trim and accessories. **Fiber Cement Siding:** A premium choice, fiber cement siding offers exceptional durability, fire resistance, and a classic aesthetic appeal. Its composition, often a blend of cement, sand, and cellulose fibers, contributes to its resilience against rot, insects, and even impact damage.
However, this robust material requires careful handling and precise installation due to its weight and rigidity. Specialized fiber cement cutting tools, equipped with dust collection systems, are recommended to minimize airborne particles and ensure clean, accurate cuts. Pre-drilling nail holes is essential to prevent cracking, especially in colder climates. Corrosion-resistant nails or screws designed specifically for fiber cement are crucial for longevity. Maintaining consistent spacing between panels and using joint flashing creates a weathertight seal, crucial for protecting the underlying structure.
Fiber cement siding often requires painting or pre-finishing, allowing for customization and adding another layer of protection against the elements. Consulting with a professional for installation is often recommended, especially for complex projects. **Wood Siding:** The natural beauty and warmth of wood siding add timeless elegance to any home. From traditional clapboard to more contemporary styles like board and batten, wood offers design versatility. However, this natural material requires regular maintenance to prevent rot, decay, and insect infestation.
Opt for high-quality, kiln-dried lumber to minimize moisture content and ensure dimensional stability. Applying a primer and paint or stain to all sides of the siding *before* installation offers comprehensive protection. Corrosion-resistant nails or screws are essential. Overlapping the siding panels according to the desired exposure, typically 1 to 2 inches, creates a visually appealing pattern and effective weather protection. A crucial step for wood siding longevity is installing a rain screen behind the siding.
This system creates an air gap, allowing for proper ventilation and moisture drainage, preventing rot and extending the lifespan of the wood. Regular maintenance, including cleaning, caulking, and repainting or staining, is crucial for preserving the beauty and integrity of wood siding. Choosing the right siding material is a significant investment in your home’s curb appeal and protection. Understanding the specific installation techniques for each material, whether undertaking a DIY project or hiring a professional, ensures a beautiful, long-lasting result. Proper installation not only enhances your home’s aesthetic value but also contributes to energy efficiency, weather resistance, and overall structural integrity. From the initial surface preparation to the final touches, meticulous attention to detail is key to mastering siding installation and enjoying the benefits for years to come.
The Importance of Flashing
Flashing, often an unsung hero in exterior renovations, plays a pivotal role in safeguarding your home against water intrusion, a common culprit in costly siding repairs and structural damage. It acts as a primary defense, diverting water away from vulnerable areas where siding meets windows, doors, chimneys, rooflines, and other penetrations. Understanding the importance of proper flashing installation is paramount for both DIY enthusiasts and seasoned professionals undertaking siding projects. Choosing the right materials and employing correct techniques are crucial for ensuring a watertight and long-lasting finish.
The selection of corrosion-resistant flashing materials is the first step towards a successful installation. Aluminum and copper are popular choices due to their durability and resistance to the elements. For added protection against moisture, especially in areas prone to heavy rain or snow, consider using self-adhering flashing tape. This flexible membrane creates a waterproof seal around intricate details and joints, further reinforcing the primary flashing. When installing flashing around windows and doors, ensure it extends beyond the frame and integrates seamlessly with the surrounding weather-resistant barrier.
This prevents water from seeping behind the siding and causing damage to the underlying structure. Proper overlap is another critical aspect of effective flashing installation. Each piece of flashing should overlap the one below it, creating a shingle-like effect that directs water downwards and away from the wall. The recommended overlap varies depending on the slope of the roof and the local climate conditions, but a minimum of two inches is generally advisable. In high-wind areas, or regions with significant snowfall, a larger overlap may be necessary.
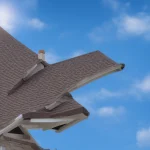
Consult local building codes and manufacturer guidelines for specific recommendations. For roof intersections, step flashing is essential to prevent water from entering the juncture where the roof meets the wall. Each piece of step flashing is interwoven with the shingles and extends over the siding, creating a secure barrier against water intrusion. This meticulous approach is especially important for maintaining the integrity of the roof and preventing leaks. Beyond these standard applications, flashing is equally vital around less conspicuous areas such as vents, pipes, and other wall penetrations.
Any point where an object protrudes through the siding presents a potential entry point for water. Sealing these penetrations with appropriate flashing materials is crucial for maintaining a weathertight envelope. For DIYers, pre-formed flashing boots are readily available for various pipe sizes and vent configurations, simplifying the installation process. Investing in high-quality, corrosion-resistant flashing and adhering to proper installation techniques will not only protect your home from water damage but also contribute to the overall longevity and performance of your siding.
By prioritizing this critical component, you are ensuring a durable and weather-resistant exterior that will withstand the test of time. Finally, regular inspection and maintenance of flashing are crucial for long-term protection. Over time, flashing can become damaged or dislodged due to weather events or other factors. Inspecting your flashing annually and addressing any issues promptly can prevent minor problems from escalating into major repairs. This proactive approach will save you money and headaches in the long run, ensuring your home remains protected from the elements. Mastering the art of flashing installation, from material selection to meticulous execution, is an investment in the long-term health and value of your home.
Troubleshooting Common Installation Challenges
Even with meticulous planning, siding installation can present unforeseen challenges that can impact both the aesthetic appeal and protective function of your home’s exterior. Recognizing these potential pitfalls and understanding how to address them is crucial for any successful siding project, whether it’s a DIY undertaking or managed by professionals. Here are some common issues encountered during siding installation and their solutions, designed to help you achieve a flawless and long-lasting finish. Uneven walls are a frequent headache in exterior renovation, especially in older homes.
Before commencing siding installation, diligently assess the wall surface with a level and straight edge. Identify any low spots or protruding areas. Use shims, thin pieces of wood or composite material, to level the wall surface, creating a consistent plane for the siding. Secure the shims with construction adhesive and fasteners, ensuring they are flush with the surrounding surface. This meticulous shimming process prevents unsightly waves or distortions in the finished siding, contributing significantly to the overall curb appeal and preventing potential water accumulation points.
Ignoring this step can lead to compromised weatherproofing and premature siding failure. Achieving clean, accurate cuts is paramount for a professional-looking siding job. Invest in high-quality cutting tools appropriate for your chosen siding material. For vinyl siding installation, a specialized vinyl siding cutter or a circular saw with a fine-tooth blade designed for plastics is essential to prevent cracking or chipping. Fiber cement siding installation demands a fiber cement blade or shears to minimize dust and ensure clean edges.
Wood siding installation benefits from a sharp saw blade and careful measuring techniques. Practice making cuts on scrap pieces to refine your technique before tackling the actual siding panels. Remember to always wear appropriate safety gear, including eye protection and a dust mask, when cutting siding materials. Proper cuts are crucial for tight seams and a weathertight seal. Nailing issues can compromise the integrity of your siding installation. Over-nailing restricts the siding’s natural expansion and contraction, potentially leading to buckling or cracking.
Under-nailing, on the other hand, leaves the siding vulnerable to wind damage and can cause it to detach from the wall. Use the correct nail size and type specified by the siding manufacturer. For vinyl siding, use aluminum or galvanized nails to prevent corrosion. Drive the nails straight and level, ensuring they penetrate the wall studs by at least 1 1/4 inches. Leave a small gap (about the thickness of a dime) between the nail head and the siding to allow for expansion and contraction.
Consistent and correct nailing is a cornerstone of durable siding installation. Moisture buildup behind the siding can lead to a host of problems, including rot, mold, and structural damage. Ensure proper ventilation by installing vents at the top and bottom of the wall, creating a continuous airflow behind the siding. These vents allow moisture to escape, preventing it from accumulating and causing damage. Install weep holes at the bottom of the siding to allow any water that does penetrate the siding to drain out.
Consider using a rain screen, a layer of material that creates an air gap between the siding and the sheathing, to further improve ventilation and moisture management. Effective moisture control is vital for extending the lifespan of your siding and protecting your home from water damage, a key aspect of responsible home improvement. Seam issues, if not addressed properly, can create pathways for water intrusion, leading to significant damage over time. Properly seal the seams between siding panels, especially at corners and around windows and doors, to prevent water from seeping behind the siding.
Use joint flashing, a thin strip of metal or plastic, to create a watertight barrier at the seams. Apply a high-quality, paintable caulk specifically designed for exterior use to seal any gaps or cracks. Ensure the caulk is compatible with the siding material to prevent discoloration or degradation. Regularly inspect the seams and re-caulk as needed to maintain a watertight seal. Addressing seam issues proactively is a key component of effective weatherproofing and long-term siding performance, a crucial consideration for any exterior design project.
Ventilation and Moisture Control: Keeping Your Siding Healthy
Ventilation is the unsung hero of successful siding installations, a critical factor that significantly impacts the lifespan and performance of your exterior cladding. Proper airflow behind the siding allows moisture to escape, preventing the growth of mold, mildew, and rot, which can compromise the structural integrity of your home and create health hazards. This is especially crucial in climates with high humidity or extreme temperature fluctuations. By facilitating moisture evaporation, adequate ventilation safeguards your investment and ensures a dry, healthy building envelope.
Installing vents at the top and bottom of the wall creates a continuous airflow, much like a chimney effect, drawing out trapped moisture and promoting circulation. This continuous airflow is essential for preventing moisture buildup, which can lead to costly repairs and premature siding failure. For optimal ventilation, consider incorporating a rain screen system into your siding project. Rain screens create a dedicated air gap between the siding and the wall sheathing, further enhancing ventilation and drainage.
This gap allows for any water that penetrates the siding to drain away quickly, preventing it from becoming trapped against the sheathing. Rain screens provide an added layer of protection against moisture damage, particularly in areas prone to heavy rainfall or wind-driven rain. They also contribute to improved energy efficiency by reducing thermal bridging and allowing for better insulation performance. The investment in a rain screen system pays dividends in the long run by extending the life of your siding and protecting your home from moisture-related problems.
When installing vents, ensure they are properly screened to prevent insect infestation. Insects, such as bees, wasps, and hornets, can build nests within wall cavities, causing further damage and posing a safety risk to homeowners. Properly sized screens allow for adequate airflow while keeping pests out. Additionally, consider the placement of vents strategically to maximize airflow and minimize the visual impact on your home’s exterior. Consult with a professional contractor or building expert to determine the optimal ventilation strategy for your specific climate and siding material.
They can help you choose the right type and placement of vents to ensure proper airflow and moisture control. Different siding materials have varying ventilation requirements. For example, wood siding, being a natural material, is more susceptible to moisture damage and requires more ventilation than vinyl siding. Fiber cement siding, while highly durable, also benefits from proper ventilation to prevent moisture buildup. Understanding the specific needs of your chosen siding material is crucial for ensuring its longevity and performance.
Consult the manufacturer’s installation guidelines for specific recommendations on ventilation requirements and best practices. Proper ventilation, coupled with meticulous installation techniques, will protect your home and enhance its curb appeal for years to come. Beyond simply installing vents, consider the overall ventilation strategy for your home. Soffit vents, ridge vents, and gable vents all play a role in creating a balanced ventilation system that protects your entire home from moisture damage. A well-ventilated attic, for instance, can help prevent moisture from migrating to the exterior walls and impacting the siding. When planning your siding project, take a holistic approach to ventilation, considering all aspects of your home’s exterior to ensure optimal moisture control and long-term protection.
Tools and Materials: Setting Yourself Up for Success
Choosing the right tools and materials is crucial for a successful siding installation. Invest in high-quality tools that are designed for the specific siding material you are using. Essential tools include a circular saw, a fiber cement cutter (if applicable), a nail gun, a level, a measuring tape, and a utility knife. Select siding materials from reputable manufacturers that offer warranties and guarantees. Consider the climate and environmental conditions in your area when choosing siding materials.
Opt for materials that are durable, weather-resistant, and low-maintenance. Don’t skimp on quality, as investing in better materials will save you money in the long run. For DIY siding projects, particularly involving vinyl siding installation, a specialized snap-lock punch is invaluable for creating weep holes and ensuring proper panel interlock. When working with fiber cement siding installation, a dedicated fiber cement blade for your circular saw, or ideally a purpose-built fiber cement cutter, is essential to minimize dust and ensure clean, precise cuts.
Investing in a quality pneumatic nail gun designed for siding, rather than a general-purpose model, will significantly improve efficiency and reduce the risk of over-driving nails, which can damage the siding and compromise its weatherproofing capabilities. Remember that proper tool maintenance, including regular cleaning and lubrication, will extend their lifespan and ensure optimal performance during your exterior renovation project. Beyond the basics, consider specialty tools that can streamline specific siding techniques. For example, a siding unloader tool can be a lifesaver when working with long planks of wood siding installation, allowing for controlled and safe material handling.
A siding gauge is another worthwhile investment, especially for vinyl siding installation, as it ensures consistent overlap and proper alignment of each course. When tackling siding repair, a seam roller can be used to create a tight, waterproof seal on patched areas. These specialized tools, while not strictly essential, can significantly enhance the quality and efficiency of your home improvement endeavors. Material selection extends beyond just the siding itself. High-quality, corrosion-resistant nails are paramount, especially in coastal environments or when using pressure-treated lumber.
Choose nails that are specifically recommended by the siding manufacturer to avoid compatibility issues and ensure proper fastening. Similarly, invest in a premium-grade house wrap to provide an effective weather barrier beneath the siding. This crucial layer protects the sheathing from moisture intrusion and helps improve energy efficiency. When selecting sealants and caulks for flashing and trim, opt for products that are specifically designed for exterior use and are compatible with the siding material. Finally, don’t underestimate the importance of safety gear.
Siding installation can be a hazardous task, so protect yourself with appropriate personal protective equipment (PPE). This includes safety glasses to shield your eyes from flying debris, work gloves to protect your hands, and a hard hat to guard against falling objects. When working at heights, use a sturdy ladder or scaffolding that is properly set up and secured. Consider wearing knee pads for added comfort and protection when working close to the ground. Prioritizing safety not only minimizes the risk of injury but also allows you to focus on the task at hand and achieve a flawless finish for your siding installation.
Professional Installation vs. DIY: Making the Right Choice
While DIY siding installation can be a rewarding experience, particularly for homeowners looking to personalize their exterior design and save on labor costs, it’s not always the best option for everyone. Complex architectural designs, challenging home layouts involving multiple stories or unusual angles, or simply a lack of experience with essential siding techniques may warrant professional installation. Attempting DIY vinyl siding installation on a complex Victorian home, for example, could quickly become overwhelming, leading to mistakes and ultimately costing more in materials and potential siding repair.
A professional siding contractor brings to the table not only expertise but also specialized tools and a deep understanding of building codes, ensuring a flawless installation that meets all regulatory requirements. They can also handle any unexpected challenges that may arise, such as hidden structural damage or the need for specialized weatherproofing. While professional siding installation undeniably comes at a higher upfront cost, it’s essential to view it as an investment in the long-term protection and value of your home.
A poorly executed DIY siding project, especially with materials like fiber cement siding, can lead to water infiltration, mold growth, and structural damage, resulting in costly repairs down the line. Before hiring a contractor for your exterior renovation, obtain multiple quotes from reputable companies, meticulously check references, and rigorously verify their licensing and insurance. Don’t hesitate to ask about their experience with specific siding materials, such as wood siding installation, and request examples of their previous work.
A comprehensive cost-benefit analysis should carefully consider the long-term value of proper installation, including enhanced energy efficiency and reduced maintenance, versus the potential costs of future repairs stemming from poor workmanship. Consider the complexities involved in achieving proper weatherproofing during siding installation. Professionals understand the nuances of flashing installation around windows and doors, ensuring a watertight seal that prevents water damage. They are also adept at managing ventilation behind the siding, preventing moisture buildup that can lead to rot and decay.
These are critical details that can easily be overlooked by a less experienced DIYer. Furthermore, professional contractors often have access to higher-quality materials and warranties that are not available to the general public. This can provide added peace of mind knowing that your siding is protected against defects and premature failure. Ultimately, the decision between DIY siding and professional installation hinges on a realistic assessment of your skills, time commitment, and the complexity of the project.
If you are confident in your abilities, possess the necessary tools, and have the time and resources to dedicate to meticulous preparation and execution, DIY installation can be a viable and cost-effective option. However, if you are unsure about any aspect of the process, from cutting siding panels to ensuring proper flashing, or if you simply feel overwhelmed by the scope of the project, it’s undoubtedly best to leave the job to qualified professionals. Prioritizing quality workmanship and long-term protection will safeguard your investment and ensure a beautiful, durable, and weather-resistant exterior for years to come. Remember, a properly installed siding system is a critical component of overall home improvement and contributes significantly to both curb appeal and structural integrity.